1.4 Using Tshark for a Deeper Dive
A Closer Look: This is not going to be a deep dive into T-Shark, however, what this will show is where you can start taking the same data that we were searching for in the above scenario of looking for user agents. Given this pcap doesn’t have a large amount of user agent data, you can manually come to the same conclusion, but that is not an ideal way to do that. Let us get into it now.
Carving out the data: Just like above, not exact, because I am not focused on the request method, I am focused on the user agent. I will filter it using two different commands so you can see the difference in output.
Command 1
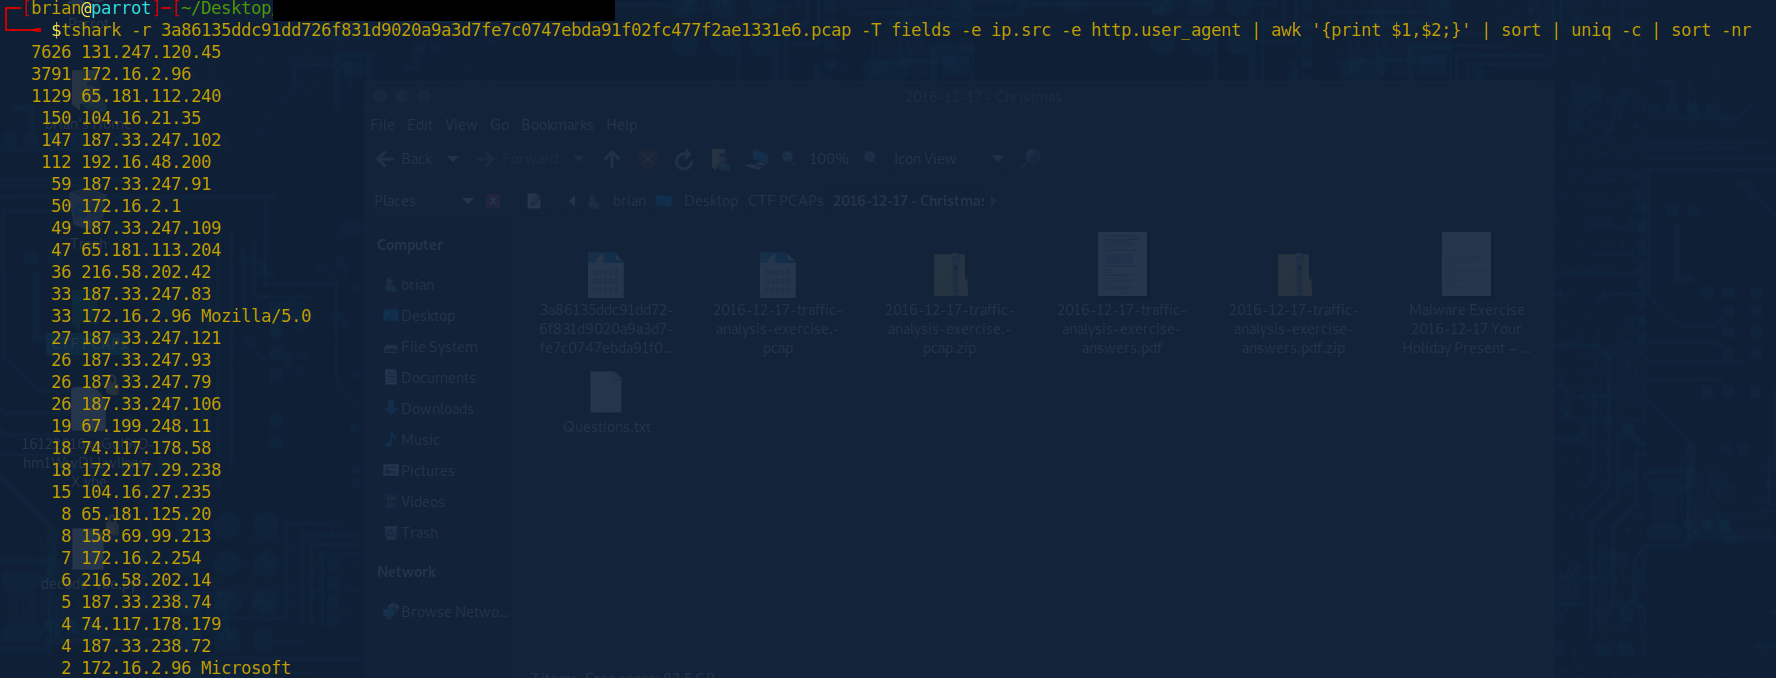
tshark -r 3a86135ddc91dd726f831d9020a9a3d7fe7c0747ebda91f02fc477f2ae1331e6.pcap -T fields -e ip.src -e http.user_agent | awk '{print $1,$2;}' | sort | uniq -c | sort -nr
Command 2
tshark -r 3a86135ddc91dd726f831d9020a9a3d7fe7c0747ebda91f02fc477f2ae1331e6.pcap -T fields -e ip.src -e http.user_agent | awk '{if ($2) print $0;}' | sort | uniq -c | sort -nr

Using Tshark for a Deeper Dive
As you can see from the output from command 1 and command 2, one is nowhere near as clean. Because this search is looking for source ip and matching that to a user agent, the first command will print out every source IP it finds and every user agent. We adjusted the command to then only show if there is data in field 2 by using a simple if statement inside of awk. Then we have a much cleaner output. We can see from the output above, that 33 times, we saw the user agent Mozilla and version, then outputs the system information of Windows NT 6.1 which is windows 7. This packet does at one point show the version of windows 7, however, that is for another day. I just wanted to show you how you can leverage Wireshark and Tshark together in a more automated fashion with presets to help speed up the hunt time and make it more efficient and less painful.

